Photography Tips for Sharp Photos |  |
- Photography Tips for Sharp Photos
- The Rare Blood Moon Eclipse Captured with Timelapse Photography (Video)
- Interesting Photo of the Day: Australia’s Boneyard Falls
- 7 Pro Photography Tips For Underwater Portraits (Video)
- On-Location Photography Tip: Use a Mini Softbox for Portraits (Video)
| Photography Tips for Sharp Photos Posted: 28 Apr 2014 07:01 PM PDT Final Reminder: Only 1 day left! in the popular deal on: Topaz Detail for Tack-Sharp Photos Have you ever compared your own photographs to those of a more advanced photographer and wondered how they get their images so sharp? I mean, just look at them! Everything in their photographs is so sharp, so crisp! How the hell do they do it?  “Capital” captured by Colby Johnson (Click Image to See More From Colby Johnson) When I first started out with photography these were things that were going through my mind constantly. I knew how to take somewhat sharp photographs, but then there’s that other level of sharpness, known as “tack” sharp. Tack sharp is basically the absolute best clarity your image can have. So how do you take tack sharp photographs? Well there are a couple of things that can help you get your images as sharp as possible: Digital photography tip #1: Use a tripodThis can be somewhat of a sensitive point. Using a tripod is annoying. It’s a bulky, cold, heavy piece of equipment that slows you down immensely when you are taking pictures outdoors. On the other side it’s the best way to get to tack level sharpness. You can have the steadiest hand in the word, even the slightest movement can cause your photograph to look fuzzy. Digital photography tip #2: Use a timerIf your camera has a timer, use it. You are basically trying to eliminate as much movement as you possibly can. I might be a slower way to take photographs but remember we are aiming for quality here and not quantity. Digital photography tip #3: LensesThis digital photography tip might be a bit out of your control right now but the better your lens is the sharper your photographs will be. Most digital cameras come with a standard lens that’s usually a small zoom lens (18 mm to 55 mm for example). The problem with these lenses is that they have a lot of moving parts on the inside and if you want a quality one it costs a small fortune. If you don’t have a super expensive lens don’t worry, there are other ways to get maximum sharpness. Digital photography tip #4: ApertureMost lenses are at their sharpest when they are about 2 stops down from wide open. Let’s say you have a 18 mm – 55 mm f/3,5 lens. If you make sure your aperture is around f/8 when you take your photograph you have a better chance of it being tack sharp.  “Breaking All The Rules” captured by Sean Nel (Click Image to See More From Sean Nel) Digital photography tip #5: Shutter speedThe shorter your shutter speed the less chance you have of getting motion blur. If you want tack sharp photographs, motion blur is your enemy. If you are taking pictures of flowers then a shutter speed of 1/250 might be more than enough to eliminate motion blur, but if you are at a sports even it’s not even close to being enough. The faster your object moves the faster your shutter speed has to be. In case of a sports even your shutter speed will have to be something like 1/2000 – 1/4000. These are just a couple of tips to increase your chances of getting tack sharp photographs. Like I said earlier you are basically trying to eliminate as much motion blur or movement as possible. If you want to learn more check out my blog. About the Author Related Deal Ending Soon:Topaz Detail is designed to create tack-sharp and highly detailed photos by enhancing natural sharpness and taking full control over image detail. Detail breaks down an image into three levels of internal detail separation and three levels of tone separation and allows you to selectively enhance or remove detail throughout your image without the side effects of halos or artifacts. They are offering it at 50% off for one more day (until the end of the month), simply remember to use the voucher code APRDETAIL at checkout. Deal found here: Topaz Detail at 50% Off Go to full article: Photography Tips for Sharp Photos |
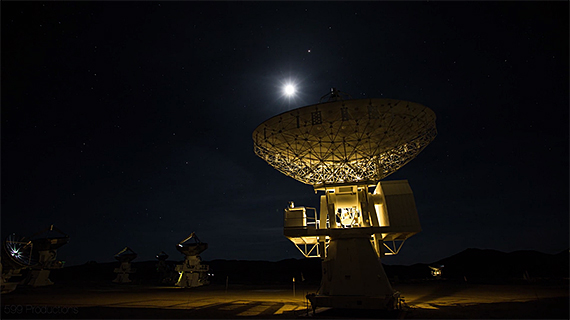
| The Rare Blood Moon Eclipse Captured with Timelapse Photography (Video) Posted: 28 Apr 2014 05:53 PM PDT Timelapse photographer, Andrew Walker was determined to shoot and display the images of a lunar eclipse in a way that nobody had ever seen before. He didn’t want to just recreate and publish images that were already sprawled all over the web; he wanted something that stood out, something memorable, something that told a story. What he came up with is a dramatic and chilling timelapsed series of the eclipse: These photos of the April 15, 2014, lunar eclipse were taken at the CARMA observatory in the Inyo Mountains in eastern California, where seriously high-tech telescopes produce high-resolution astronomical images. Walker used two Canon 5D Mark III cameras with Canon lenses and a RED Epic with a 300-1200mm Canon Century zoom lens that is used on IMAX cameras.
While the equipment produced clear, crisp images of the event and the location, Walker really tied the story together with some great music from 2001: A Space Odyssey to give it the eerie feel. Go to full article: The Rare Blood Moon Eclipse Captured with Timelapse Photography (Video) |
| Interesting Photo of the Day: Australia’s Boneyard Falls Posted: 28 Apr 2014 03:03 PM PDT Bombo Headland was the site of a tremendously scientifically important quarry in New South Whales, Australia. That’s where, in 1926, someone discovered the world’s longest geomagnetic polarity interval, near what would become the town of Kiama, giving the quarry its geological title of the “Kiaman Reverse Superchron”. Also, it’s really pretty:  The basalt columns, once part of a quarry, allow the waves to shoot straight up, requiring good timing for the waterfall effect. (Via 500px. Click for larger image.) The shot makes the water look like painted brushstrokes. Australian landscape photographer Peter Hill snapped it in August 2011 with a Canon 5D Mark II and a 45mm tilt-shift prime lens. as part of his ongoing series capturing the lush greenery and harsh rock of Australian nature. Despite some critics of the photo believing it to be more processed than it is, Hill, on his 500px page, assures us it’s real:
Go to full article: Interesting Photo of the Day: Australia’s Boneyard Falls |
| 7 Pro Photography Tips For Underwater Portraits (Video) Posted: 28 Apr 2014 12:59 PM PDT Underwater photography isn’t for the easily unmotivated. Aside from being technically difficult, there are an assortment of other concerns. It requires a lot of forethought and planning. If you are thinking about getting started in underwater portraiture or have already tried your hand at it, the advice Brooke Shaden shares in the video below could prove to be invaluable: Tips For Taking Underwater Photos
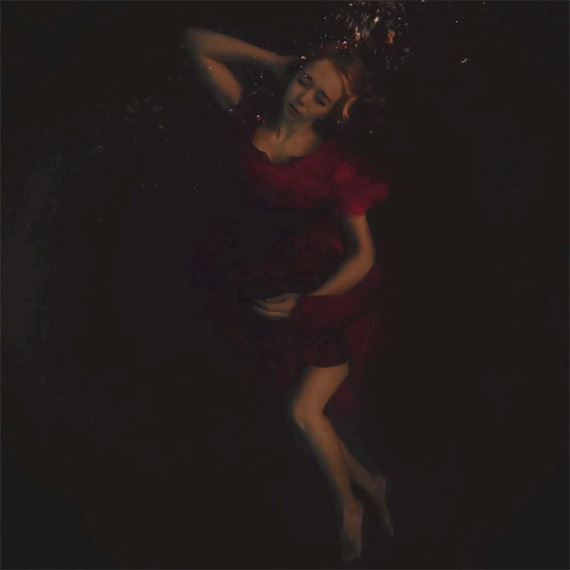 Take multiple underwater shots so you have options for compositing. Shaden, well known for her surreal self-portrait series, has been photographing underwater since the beginning of her career. She formerly shot with a Canon 5D Mark II with an Ikelite underwater housing but has since moved onto a waterproof Panosonic Lumix point and shoot, which she loves for its ease of use, portability, and great image quality. Go to full article: 7 Pro Photography Tips For Underwater Portraits (Video) |
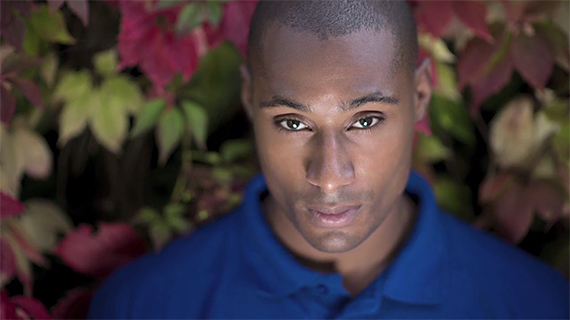
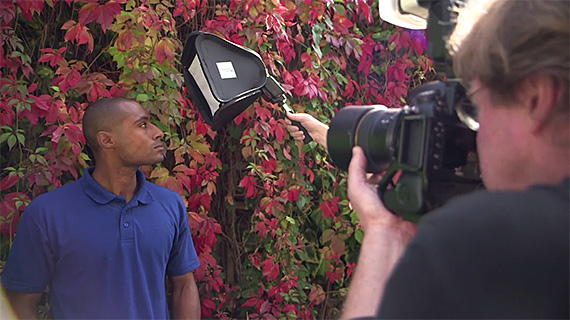
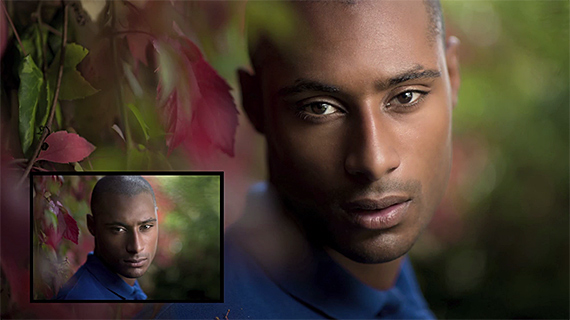
| On-Location Photography Tip: Use a Mini Softbox for Portraits (Video) Posted: 28 Apr 2014 10:44 AM PDT Lighting in portrait photography can be tricky, especially if you’re not in a studio setting or if you’re working by yourself. You don’t want to be lugging huge softboxes and extra equipment around everywhere. Or constantly stopping the shoot to move those softboxes around. In this case, a small, portable softbox can be a real life saver that still contributes to flawless portraits: In the above video, photographer Joe McNally uses his Ezybox Speed-Lite Plus to effectively create focused lighting on his model in an outdoor photo shoot. Using the small, mobile light shaping tool, McNally teaches us how to create beautifully lit, stunning portraits. He easily moves the speedlight and softbox around the model to create shadows that portray an ominous appearance, define chiseled features, and emphasize character.
You have to be careful when using a small source like this, because the smaller the light shaper, the more harsh and spectral the light can appear. McNally says, as a photographer using a softbox, you need to experiment with the lighting. Move, direct your subject, relate to them, talk to them, play with the light. With a small softbox, it’s easy to do this. If you’re working by yourself or with only one other person, and you need to be mobile and light, a small softbox is a great solution; it gives you a nice, quality light and it moves fast with you. You can position it very easily and move it around as you desire.
While this softbox may not look like much, it has many of the same characteristics of a bigger softbox. It has an interior baffle, an interior diffuser that velcros in, as well as an exterior diffuser. When he uses it, McNally leaves the dome diffuser on in his strobe, and with the box’s two diffusers, he is triple diffusing his light to eliminate harshness.
Go to full article: On-Location Photography Tip: Use a Mini Softbox for Portraits (Video) |

| You are subscribed to email updates from PictureCorrect Photography Tips To stop receiving these emails, you may unsubscribe now. | Email delivery powered by Google |
| Google Inc., 20 West Kinzie, Chicago IL USA 60610 | |
No comments:
Post a Comment